Genshin Impact - Heizou Build Guide

By Helen Gray | Created: July 29, 2022 | Last updated: February 25, 2026 | Read Time: 12 minutes

Introduction to the Heizou Build Guide 

Welcome to another Chicks Gold blog! This week we will be guiding our users through what it takes to create the best Heizou build, showing you which weapons, artifacts, and teammates will propel you to victory time and time again. Additionally, not only do we provide these helpful guides for our users to find the best ways to excel in-game, but we also offer services to assist them. So whether you need to build your bank, get a state-of-the-art item, or an account, you can buy currency, items, and much more to help you rise through the ranks of GI. So now that we have informed you of our high-end services, let's get into what it takes to build this epic character successfully. 

Who is Heizou? 

Heizou, full title 'Shikanoin Heizou’, is a detective from Inazuma. He is considered to be the finest detective working for the Tenryou Commission. 

Shikanoin Heizou is a detective from Inazuma. In fact, he is the number one detective that works for the Tenryou Commission, which is said to harbor a deep rivalry with the detective agency run by Sango. His laid-back attitude toward the discipline required in his line of work certainly shows his cocky and mischievous side. He's sure to be a great addition to any player's Rosta. 

The character makes for an epic DPS option; he is easy to acquire constellations for, comes with his own unique playstyle, and not to mention he fits into almost any team dynamic!

Now that we have discussed his character let's take a more in-depth look at what else this epic character has to offer. 

How to Acquire Heizou

The easiest way for players to get their hands on this epic 4-star character is to summon a 5-star banner, in which Heizou should be one of the three Rate-Up-4-star characters featured. Though it is possible to get him using a Standard Wish Banner, he will be competing amongst every other 4-star character; far lessening your chance of getting him on your team. Here are the banners which you can find him most commonly: 

  • Kaedehara Kazuha's 1st Rerun Banner (Version 2.8) – 13th of July 2022 to 2nd of August 2022 
  • Spark Knight Klee's 2nd Rerun Banner (Version 2.8) – 13th of July 2022 to 2nd of August 2022

What You'll Need To Level Up to Get Heizou in Genshin

You will be required to keep an eye out for the following items throughout the game in order to get Heizou from levels 1-90. 

Onikabuto Beetles

These small purple bugs are found throughout the game. They are often stuck to objects and services, commonly found on cliff faces and trees. One hundred sixty-eight of these beetles are required to get to level 90, so be sure to remain vigilant.

Vayuda Turqouise Crystals (Anemo Crystals)

To get your hands on the Turquoise Crystals needed to level up, you can do one of the following. 

  • Defeat bosses in Trounce Domains (weekly events)
  • Take part in daily commissions
  • Convert gemstones using the Alchemist Table and Dust if Azoth

A total of 1 Silver, 9 Fragments, 9 Chunks, and 6 Gemstones are needed.

Treasure Hoarder Insignias

Upon defeating certain Treasure Hoarders, these Insignias will be dropped for collection. You can locate these enemies when they spawn around Teyvat in camps and hideouts. Make sure to keep an eye out for these enemies when on your travels; you will be required to obtain 18 Treasure Hoarder Insignias, 30 Silver Raven Insignias, and 36 Golden Raven Insignias. 

Runic Fang

Players can get their hands on Runic Fangs by defeating the Ruin Serpent. This enormous snake-like creature burrows underground and erupts through the surface to strike. You will require the use of the light you should have acquired in the Chasm quest chain to take down this boss effectively. Forty-six of these Runic Fangs are needed to ascend to level 90.

Additionally, like all other characters, Heizou will require the Level Up Books and Mora. Therefore, a total of 420k Mora and 415 Hero's Wit EXP Books are needed to reach level 90.

Heizou Abilities 

Heizou has an epic success rate as a DPS-heavy character; this is due to his uniqueness. His playstyle is found in no other character, even those 5-star units. 

Like all Catalysts, his attacks deal elemental damage rather than physical, but this doesn't stop Heizou from being a fantastic choice for battle. Let's take a more in-depth look at all this character has to offer on the battlefield and what makes him one of Genshins most unique: 

Heartstopper Strike

Heizous' Elemental Skill is a wind-up punch that can be charged up four times. At four charges, this skill becomes one of the most potent and damaging skills in the entirety of GI.

Fudou Style Martial Arts

This is Heizous's normal attack; it allows him to play like no other character in the game. This move uses Anemo-imbued punches and kicks to destroy the enemy; rather than the more commonly used elemental projectiles.

Windmuster Kick

This Anemo AOE attack can be used at range. Though this doesn't offer as much damage as Heizous' skill, it does deal its fair share of damage. This move allows hits to take place outside his usual range; it also comes with high tracking, meaning an impact is guaranteed every time. 

This move causes an additional explosion that accompanies its vacuum effect when it encounters an element like Pyro or Cryo, dealing more DPS. 

Best Weapons 

Lost Prayer to the Sacred Winds 

This 5-star Catalyst weapon offers up to 532 ATK and Heizou a considerable increase in his damage dealt; it additionally helps his CRIT rate by providing a 30% bonus, and movement speed is increased by 10%. This weapon also increases Catalyst attack damage by 32%. It is essentially the perfect weapon for Shikanoin Heizou as it massively benefits all of his skills and moves in battle. 

If you have some difficulty getting your hands on the Lost Prayer to the Sacred Winds, there are some alternatives that will still adequately assist you in battle. 

The three alternate weapons for Heizou: 

The Solar Pearl

This weapon offers a similar CRIT rate bonus to the Lost Prayer and good weapon ability. Additionally, you can get this weapon in your inventory through the seasonal pass, which becomes available at level 30.

The Widsith 

This weapon is an overall good choice for most characters as it has a diverse range of effects; the Widsith has three states: 

  • 60% ATK buff
  • 48% buff to all Elemental DMG
  • 240 point increase to Elemental Mastery

All three of these bonuses are benefits to Heizou, making The Widsith a fantastic match for those unable to find the Lost Prayer in their grasp. If players are looking to acquire this weapon can be done through the use of wishes.

The Sacrificial Fragments

Though this weapon may not seem like a logical choice at first, as the first two alternatives offer an increase in damage, this weapon offers a chance at reimbursing the Elemental Skill upon damage being dealt if the Elemental Skill in question is in use. For instance, this character's Elemental Skill has a long cool-down, so this weapon offering back-to-back strikes can be incredibly helpful. Players who wish to take this route will need to use the Gacha System to add Sacrificial fragments to their inventory.

Best Artifact Set

Now that we've covered the best weapons and Heizous abilities let's turn to the best artifact set for this character. In our opinion, the best set for this particular character is the 4 Piece Viridescent Venerer.

This set grants a 15% increase to Anemo damage at two pieces, which is ideal for Heizou as nearly every move he makes produces Anemo damage. At four pieces, this artifact set increases damage to all Swirl reactions and causes an Elemental resistance decrease to all those hit by the Swirl. Essentially, there is little that can go wrong when using this artifact set.

Alternative Artifact Sets

If you are unable to get the complete set with adequate pieces, Gladiators can act as a sub as a Piece. This will grant an 18% ATK bonus to whoever is wearing the set. This is not going to match up to the 4 Piece Viridescent Venerer, but it is undoubtedly the go-to alternative.

Best Teams for Heizou

For our first team suggestion, we recommend: 

This team sees Heizou at the forefront, acting as our Main-DPS. Following closely behind as a sub DPS, we have Diluc; Fischl will take the role of both attacker and defender, with Jean acting as this team's healer. This team makes good use of the Swirl and Overload to ensure the damage dealt is catastrophic. 

Our second team suggestion is as follows: 

  • Heizou
  • Yelan
  • Yae Miko
  • Shinobu

Similar to the first team suggestion, this team will too be focusing on Swirl, with Heizou as our main DPS; however, this time, we won't be paying as much attention to Overload. We will instead be turning it to Electro-Charged. Our sub-DPS this time will be Yelan, Yae will act as off-field support, and Shinobu will be our team healer.

And there we have it, all you need to know about Heizou and his phenomenal abilities, skills, and more. We hope you have found all you need to commence the best Heizou build possible in our Genshin Impact Heizou Build Guide! We always aim to please at Chicks Gold, whether we're offering epic digital assets or solid gaming advice; so, if you're looking to find out more about making your Genshin journey the best it can be, click here! We also have our latest guide here for our Valorant lovers. If you're looking for something else, be sure to check out our entire library here, we look forward to seeing you next week!


Author profile
Helen Gray

Helen is a gaming blogger with a talent for dissecting complex gameplay. Her insightful analysis and vivid writing style place readers right in the heart of the games she passionately explores.


Related Articles
logo
D2R Sorc Leveling Guide: Casting For Leveling D2R Sorc Leveling Guide: Casting For Leveling Tips & Tricks

If you're considering starting a new journey as a Sorceress in Diablo 2 Resurrected, then you're in the right place. We'll show you how to start from scratch, how to create the best builds, obtain the finest gear and master skill distribution. D2R is constantly evolving, creating more in-game possibilities as you navigate through the story; at times causing more difficulties. Fortunately for our readers, this D2R Sorc Leveling Guide covers all crucial aspects of the game, allowing you to create a Sorceress stronger and more fearsome than ever before. So, let's get into it! 

Diablo 2 Resurrected Sorceress Leveling Guide: Skills & Attribute

Let's kickstart this process the right way by checking out some essentials. Skills and stats are essentials as you navigate through the Sorc D2R Leveling Guide. If you’re a beginner, you will know some skills don’t escalate gracefully, but some do, so you must understand what you select to evolve your Sorc character. Here is an excellent distribution from level 1 to 75, with the most possibility of having value with or without gear. 

Act 1 Normal: Up To Level 13

At the earliest levels, you must focus on the Lightning Skill Tree. Still, you will slowly move to Blizzard skill at a later stage, so your first move with the skill points will be like this: 

  • Level 2-4: Charged Bolt
  • Den of Evil: Charged Bolt
  • Level 5: Save Skill Point
  • Level 6: Frost Nova + Static Field
  • Level 7-9: Static Field
  • Level 10: Telekinesis
  • Level 11: Frozen Armor
  • Level 12-13: Nova

In the D2R Sorc Leveling Guide, you should distribute your Stats or Attribute Points between Vitality and Strength. You will spend your points as follows: 

  • Level 2 to 10: Vitality 
  • Level 11 to 13: Strength

D2R Sorc leveling guide

Act 2-5 Normal: Up To Level 26

You must keep going to keep your focus on the Lightning Skill Tree; fortunately, following this leveling method should help you reach level 26.

  • Level 14-17: Nova
  • Radament: Save Skill Point
  • Level 18: Nova + Teleport
  • Level 19-20: Nova
  • Izual: Static Field
  • Level 21-26: Nova

You will use your Attributes Points between Vitality and Strength as follows: 

  • Level 14-16: Vitality
  • Level 17-21: 22 into Strength, 3 into Vitality
  • Level 22-26: Vitality

Respec + Act 1 Nightmare: Up to Level 35

At this point in our D2R Sorc Leveling Guide, you will experience a twist since you will now have to focus on the Cold skill tree, and you must save a skill point at the Respec once you reach level 30 since this will provide you with Cold Mastery and Blizzard. You should spend your Skill points as follows:

  • Level 27-29: Blizzard
  • Level 30: Blizzard + Cold Mastery
  • Level 31-35: Blizzard

Your Stats will be different this time because you will need to allocate most of the points to Strength until you can wear your gear, and for the rest of the points, they must go into Vitality. 

Act 2 Nightmare - Act 5 Hell: Up To Level 75

Once you change the difficulty, the game will be more challenging, but you will preserve the same idea of focusing on making your way to the Blizzard skill and the Cold Skill Tree. In our D2R Sorc Leveling Guide, you use your Skill Points as follows: 

  • Radament: Cold Mastery
  • Level 36-43: Blizzard
  • Izual: Cold Mastery + Glacial Spike
  • Level 44-50: Glacial Spike
  • Level 51-56: Fire Mastery and prerequisites for Meteor
  • Level 57-72: Meteor
  • Radament + Izual: Meteor
  • Level 73-75: Glacial Spike

For the Stats allocation, we recommend spending all your points in Vitality. However, if you need more Stats Points to upgrade your gear, you can invest some in Strength, but it shouldn’t be your priority. 

D2R Sorc Leveling Guide: Progression

The progression itself is challenging, but this guide will clear any confusion on what to do to follow the Skills and Stats suggestions described in this Sorc Leveling Guide D2R. This journey will take you from zero to hero when you select Sorceress as your character, so let’s begin. 

Early Stages

In the beginning, when you choose Sorceress as your character, you will notice that the path to leveling up comes with a switch. First, you must focus on Nova as your main skill, then move to Blizzard, followed by Meteor, but this will take a while. That will be your north star in this D2R Sorc Leveling Guide. 

As you can see, the first skill you must level is Charged Bolt because you will use it as a damage-dealing skill in the first levels and through Act 1. If you have numerous enemies, you must use this ability at a distance to make it work to the fullest extent; but if you want to destroy a specific target at close range, it will create a shotgun effect. It’s excellent for fighting bosses. At level 4, you must clear out Den of Evil, where you can obtain items like Rings, Amulets, Charms, and an important Skill Point. 

When you reach level 5, you will unlock Static Field and Frost Nova. Static Field will be a powerful tool in the battle to reduce a percentage of the enemies’ current life; because of this, this needs to be your initiator to get the maximum out of this skill. On the other hand, Frost Nova is great to use since it’s a utility skill that will slow down the enemies on the battlefield. You’ll also want to focus on Elite Group for a faster level-up since it gives you more XP than individual monsters.

In our Sorc D2R Leveling Guide, we recommend buying a Staff or a Want at Akara that gives a 10% Faster Cast Rate to Charged Bolt. This will be a plus, so it’s a recommendation you should take in case you want to cause extra damage. In Akara, you can sell all the items you obtain from Den of Evil and get some gold. 

As will most D2R leveling guides, you will need to farm once you reach a certain point; in this case, The Countess. In this location, you must farm the following runes: 

  • Tal
  • Eth
  • 2Tir (If you can farm this rune, you must slot in a (2) Socketed Helmet to get the benefit of getting Mana per each kill) 

When you reach level 9, you will have access to Frost Armor, which is an extra layer of defense, and it will help you survive while using Charged Bold and Static Fields. You will also have Telekinesis; you will be able to move objects from a limited distance. Once you reach level 12, you will switch to Nova as your main damage-dealing skill, but you will need to have at least 2 or 3 Skill points into it since Charged Bolt will be more robust. The skill rotation you should use is Static Fields, then Frost Nova to slow down, and lastly, Nova to finish all the remaining monsters. For bosses, use Static Fields until it is almost over, then use Nova. 

If you want to improve your Faster Cast Rate, you can pick any Ring and Amulet that can do so. Moreover, if you equip the Wand of the Apprentice, you can get it from Akara. You will get a 37% Faster Cast Rate by combining these items with Stealth. Another great tip to increase your mana is to get a Gemmed Cap. At the end of this early phase D2R Sorc Leveling Guide, defeat the first Act Boss, Andariel - Maiden Of Anguish, after obtaining all the runes in the Catacombs Level 4.

sorc leveling guide d2r

Middle Stage

You should be around level 17 when you reach the middle stages; at which point, it’s time to put your runes to use. You will use Tal and Eth to create the Stealth Rune Word. It’s a simple process: You must put Tal and Eth into a (2) Socket Armor. Once you are at level 18, you will gain access to your Teleport, improving your movement. A great addition to your skill set, allowing you to navigate obstacles and get out of certain locations when danger is overwhelming. 

Continuing this D2R Sorc Leveling Guide, avoid going through Radament until level 18. Instead, enter Lut Gholein to find a belt from Farah. You can use this belt to bring more Potions with you. Also, find jewelry that will help you with Faster Cast Rate; you should find an option to gain an extra 20% to increase your damage. 

At level 21, the most important achievement is you will make and use Ancient’s Pledge Rune Word. However, you will gain access to this rune automatically after completing the second quest of Act 5. You will have access to runes Ral, Ort, and Tal after going through Act 3 and 4 in Normal, but you can farm them if needed by going through it again or using The Countess and other locations in those chapters. After you gain access to the Ancient’s Pledge Rune Word, create one and put it into your stash. 

You must then go after Baal. You can kill Izual for an extra Skill point, but before that, you should open The Secret Cow Level. Look for a Crystal Sword or a Broad Sword while leveling up to 25. You will spend some time there since you can farm XP and obtain certain items to help you through your Sorc Leveling Guide D2R journey. Once you get your Sword Base for Spirit, use the reward from Act 5 Quest 1 to socket it. You should kill the Waves in the Throne of Destruction to reach level 26; after reaching the level, visit Akara to Respec before entering Nightmare difficulty. 

Respec

When you reach level 24, you will be able to unlock Blizzard, which will become your main skill for combating enemies after the Respec. Blizzard is an AoE spell that will slow your target, and it’s the spell with the most damage. This skill requires some ability to use it since you have to aim, and there are some difficulties with the projectile speed, so it’s key to understand how to use it and predict the moves of the enemies and hit them. It will take practice to get used to Blizzard. 

The best option for practicing with the Blizzard skill is to use it in an arena setting. Doing so will allow you to use it multiple times and get the hang of things. Once in use, you will notice opponents further afield are slowed, so put it on them to inflict the highest damage. For Static Fields, you should focus on tanky enemies for their smaller radius after Respec. Going through Respec is to put some levels in Ice Blast and Glacial Spike so you will continue casting spells and dealing damage while waiting for Blizzard cooldown. 

Nightmare

After finishing Respec and continuing with the D2R Sorc Leveling Guide, you should enter Nightmare difficulty. Your first move is to go to Akara and buy Coral Heavy Gloves, a Garner Belt of the Colossus, and Coral Boots of Haste; similar items to these will work as well. Moreover, you will start buying Upgraded Potions when you reach level 26, so it’s a great level to start your journey in this difficulty. 

You must complete the first quest for a Skill Point and move to the Black Marsh Waypoint. Start farming in The Countess for more Rune Words you will use in the near future. You will find the following runes: 

  • Sol 
  • Tal
  • Thul
  • Anm 
  • 2 Ort 

With the runes, you will create a Spirit Crystal Sword and a Lore Cap; to do so, you must insert the runes Tal, Thul, Ort, and Amn in that exact order in your (4) Socket Crystal Sword. The Spirit Crystal Sword has a 28% Faster Cast Rate, so you will require a single +10% Faster Cast Rate Ring or Amulet to reach the 63% Faster Cast Rate Breakpoint. You can use your extra slots for other stats like Resistance, Life, Mana, or +x to Skills. 

In this D2R Sorc Leveling Guide, you will need to buy a Wand of Lower Resistance from Akara or Drognan when you reach levels 30 to 35. After you reach level 36, you must keep it in your inventory and use Lower Resist against all Act bosses. This could potentially be your gear for the rest of the campaign, though you can look out for upgrades as your adventure continues. 

You must continue your progression through the Act, though most of your gameplay will stay the same in terms of skill progression: Blizzard, Static Fields, and Teleport. When you reach the Chaos Sanctuary you must kill Lord de Seis first since he has a chance to spawn Immune to Cold. If that happens, you should reset the area. Complete the Act in Nightmare, then move to the next phase in Sorc D2R Leveling Guide.

d2r sorc leveling guide

Hell

Once you start your adventure on Hell difficulty, you should avoid Den of Evil for all the monsters that are immune to cold. Since your skills are focused on the Cold Skill Tree, it will be more challenging. However, you can return after you unlock Meteor and reach level 10 or more. 

This part of our D2R Sorc Leveling Guide recommends focusing on Elite Groups and skipping anything Immune to Cold. Still, you will need to face two areas with some of those monsters: the Chaos Sanctuary and the Ancients fight. For the Chaos Sanctuary, all three bosses have a chance to spawn with Immune to Cold and Fire. Reset the area if that happens until you pass it. You must go to the top right Seal first, the Lord of Seis and open it; check his Immune to specific elements, but to save some time, don’t kill him yet. Return to the center and fight against the Infector of Souls at the bottom right Seal. After opening the Seal and checking the Immunities, the only thing left is to kill them after checking they are not immune to both. Move your way to the top left Seal, the Grand Vizier of Chaos, but don’t worry; he’s not likely to cause a reset for the Immune. 

For the Ancients, Korlic will always spawn with Immune to Cold, Talic with Immune to Fire, and Madawc with Immune to Lightning. However, each has the chance to spawn with an extra immune to one more Element. The only way to find out is to start the battle. If they are Immune to Cold, reset the area. There will be more Affixes that can have Immune, so try to avoid them. Avoid Korlic with Teleportation, Extra Strong, and Lighting Enchanted.

Moreover, try to avoid Might and Fanaticism Auras. You can kill Talic and Madawc by running in circles. To end with Korlic, use Meteor, but it will take some time. 

At the end of your progression, you will be level 75 after farming in Hell difficulty. However, you still follow the Skills and Stats mentioned in our D2R Sorc Leveling Guide. 

Diablo 2 Resurrected Sorceress Build

Your build will change when you upgrade your skill, but there are items you will have to use as gear in most scenarios, so there won’t be a big gap between the gear you built and the upgraded option. Let’s find out the Best Diablo 2 Resurrected Sorceress Build.

  • Leaf: It’s a Rune Word that will be an excellent alternative for swapping weapons because it will improve your Fire Skills, helping you to deal with the Immune of Cold monsters. 
  • Bone Wand of Lower Resistance: This is the best item for dealing with monsters with high resistances. You can buy it from Malah in Act 1 Normal, Akara Act 1 Nightmare, and Drognan Act 2 Nightmare. 
  • Skin of the Vipermagi: In the D2R Sorc Leveling Guide, you will end up with this body armor since it’s the best one you can equip on any caster for leveling. 
  • Magefit Gauntlets: It will give you FCR and help to increase your Fire Skill damage. 
  • Hsarus’ Iron Heel / Sander’s Riprap: These boots will provide a Faster Run / Walk and are easy to find since they are a common drop. 
  • Stone of Jordan: This unique ring will give you a +1 for all your skills. 
  • Raven Frost: This unique ring will give you Cannot be Frozen.  
  • Mara’s Kaleidoscope: An amulet that will grant +2 to all Skills. 
  • Splendor: It can be a great replacement for your Ancients’ Pledge Rune Word if you can go with the resistances. 
  • Spirit: A Rune Word that is great for slightly lower resistances, but instead, you will get FCR and +2 to all Skills. 
  • Lidless Wall: It will be a great option that gives FCR and +1 to all Skills. 

Of course, you will maintain your Spirit Crystal Sword and Ancients’ Pledge Rune Word in combination with some items. Still, regardless of what you choose, with all of these items, you will have the best options for D2R Sorceress Leveling. 

D2R Sorceress Leveling: Farming Spots

Once you reach level 75, it can be difficult to go over, but there are some great spots to continue until you master and top your character to level 99. It will take time to reach your objective since you will experience a rate decrease, so try to go in with a full party to gain more XP. Here are some places you can use for farming. 

Act 1

  • Mausoleum
  • The Countess
  • The Pit 
  • Andariel 
  • The Secret Cow Level

Act 2

  • Ancient Tunnels 
  • Arcane Sanctuary
  • Summoner

Act 3 

  • Lower Kurast 
  • Travincal 
  • Mephisto 

Act 4

  • Pindleskin 

d2r sorc leveling guide

Sorc Leveling Guide D2R: FAQ

We know you will have some questions about the D2R Sorc Leveling Guide, and it’s our duty to answer and clear all those doubts, so let’s begin.

What is the fastest way of D2R Sorceress leveling?

The best way to level up is to use Blizzard as your main damage-dealing skill. However, it will take time, as you must start with Nova and then switch to another skill until you can unlock and level up Blizzard. 

How much strength does a Sorceress need?

Depending on your gear, you will need to invest some Stats Points on it, but it can be between 99 and 119 Strength. Make sure if you need that much for your gear. 

D2R Sorc Leveling Guide Summary

If you choose the Sorceress as your character, you will find it fun to play through the many phases and stages of your journey. Besides, gaining all the levels will take some time; you will master every aspect during the adventure. However, if you decide to go over another character, you can find more guides like this in our blog section. Moreover, you can buy D2R items on our page at excellent prices and with a wide variety of rare and unique items. That will be all for now. See you in the next blog post!

logo
Fortnite Building Masterclass: Learn to Build Skyscrapers Fortnite Building Masterclass: Learn to Build Skyscrapers Tips & Tricks

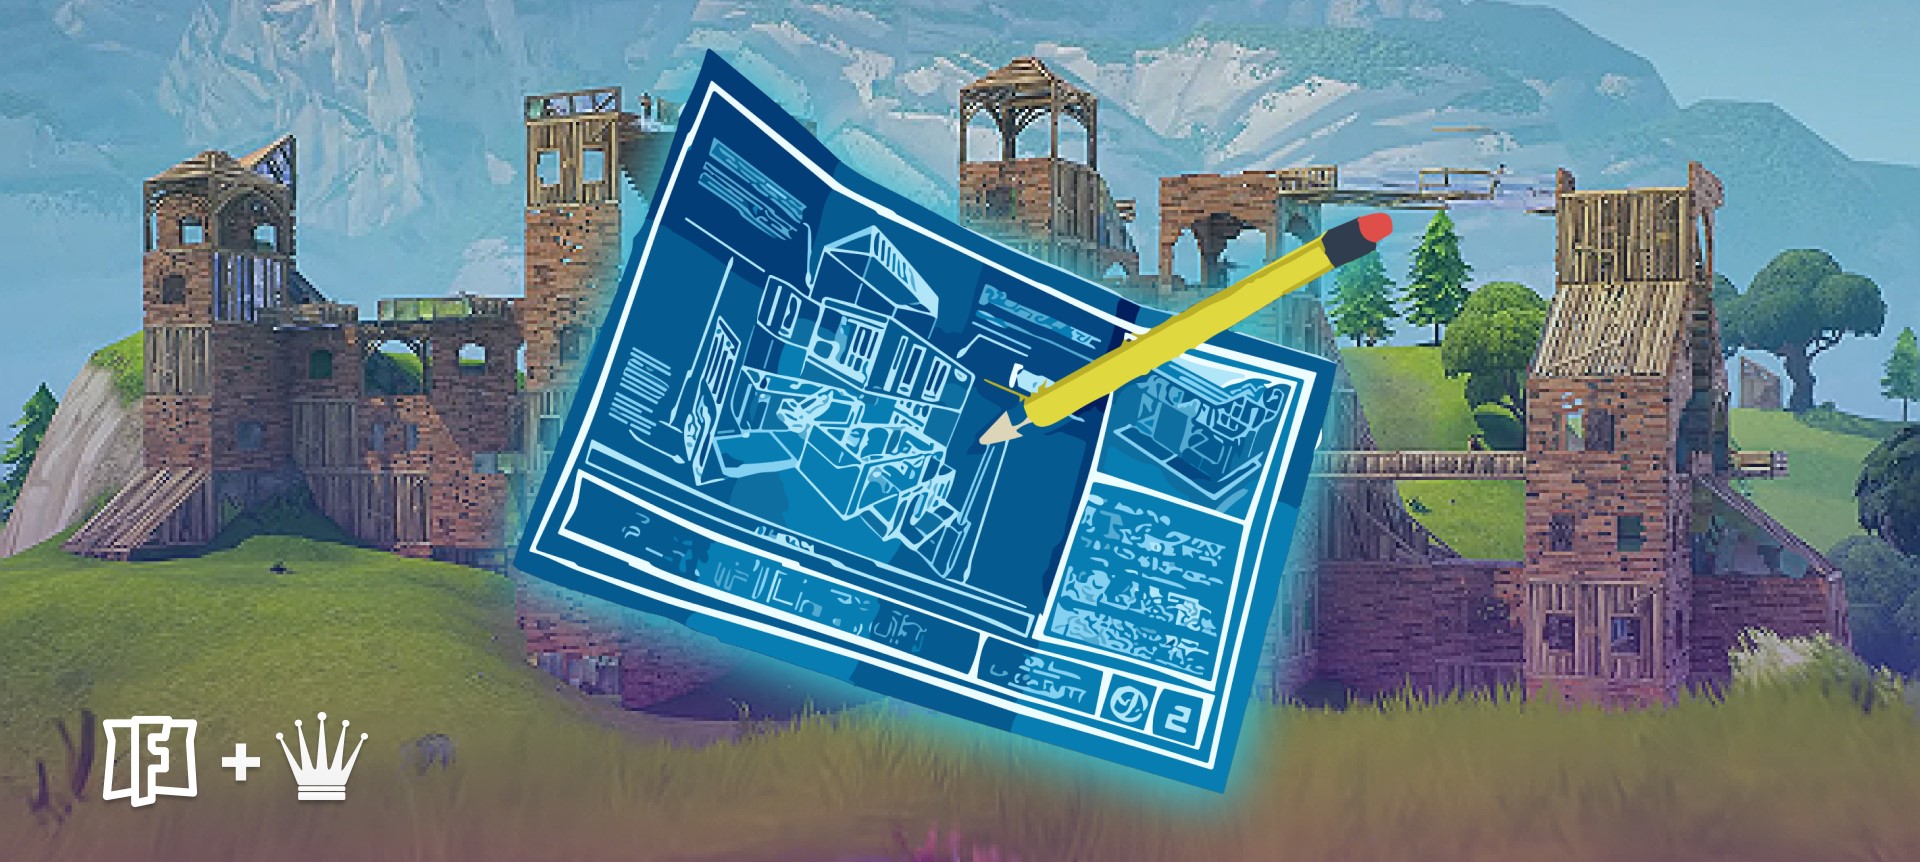
Welcome to Chicks Gold Blog Series!

We are back once again to walk you through your gaming hurdles. This week's article will focus on building tips in Fortnite, as building has recently made a comeback after being temporarily disbanded in Battle Royales. We'll discuss the basics, some strategies, advanced building, and common mistakes to avoid. So, without further delay, let's get into the important stuff! 

What Is the Significance of Fortnite Building? 

Since 2017, Fortnite has been building its fanbase with its intense content, competitive environment, and exciting upgrades accompanying each season. The game has also caught the eye of many through the introduction of pop culture characters such as Wolverine, Deadpool, Goku, and many other famous faces. But building has always been a fan favorite, as it provides additional excitement to the game as players can create their own cover, build structures for better vantage points, and much more. 

After the feature was removed from battle-royale early last year, players found themselves disheartened, as without the ability to build structures in-game, the dynamic was turned on its head. Many users felt that without the use of building, their matches just weren't the same. So, why is building in the game so important? 

Fortunately, Fortnite building has been reintroduced, and we heavily recommend users get their skills back up to par because, without this technique, you're at a severe disadvantage. Even with the best aim and insane accuracy, you can still lose that #1 spot if your competitors have the high ground. 

Undoubtedly, it is possible to secure a win without building, but it is undeniably more manageable to incorporate it into your skill set. The building function has two primary uses, the first being fortification. Once you drop into the map in a match, it's a free-for-all, with players taking down anyone in their sights, so ensuring you have cover is going to provide an instant benefit. The second is movement, as some areas of the map are simply inaccessible without the use of building. With this in mind, let's discuss basic Fortnite building.

fortnite tower, fortnite building strategies

Basic Fortnite Building - What Does It Entail?  

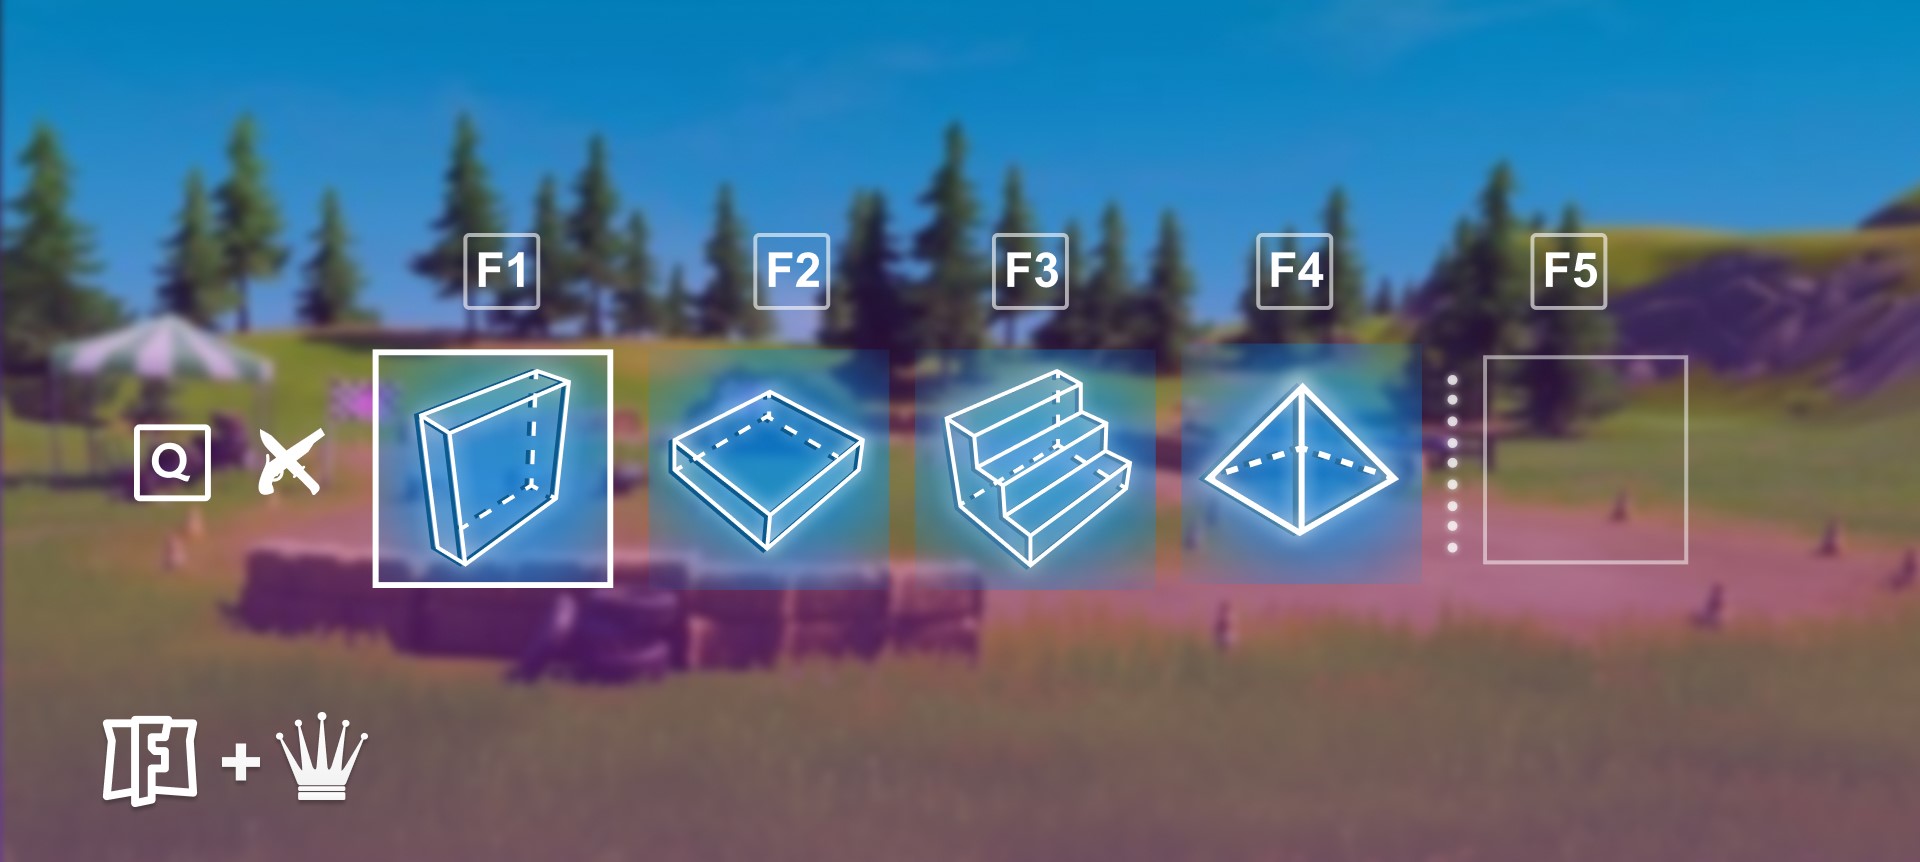
To understand building, you first have to understand the structures and the basics of how they function. Players can create four main structures: walls, floors, pyramids, and stairs. Each of the structures (excluding walls) takes up a 1x1x1 surface area of the building grid, each tile is 5.12m in length, and it is essential buildings are connected to an existing floor or wall structure. Failure to correctly connect the structure you're building will see it quickly depleting one tile at a time until the framework entirely disappears or is reduced to the segments which are correctly structured.

 In addition, there are three materials from which you can build your structures: wood, metal, and stone; all of these materials mean your structure will have different properties. Wooden structures are the quickest to build but are also the least structurally sound; metal is time-consuming to build but provides a much stronger fortress, and stone falls somewhere between the two. 

You're also going to a pickaxe to collect the materials needed for your structures. The best way to acquire these materials is to check your surroundings for other players; once you're in the clear, take your pickaxe and chop at some structures. Trees, rocks, buildings, etc., can be harvested for the needed metal, wood, and stone. 

The final thing you need to be aware of within our Fortnite building basics is the color you see when placing your segments. 

Light Blue - You're able to place the building in the area you have chosen. 

Red - Placing the structure in this space is not possible. 

Yellow - You can place the structure where selected, but an obstruction will hinder progress. You can bypass this issue by eliminating the obstruction. 

The last thing we'll touch on in the basics of building is the controls for building. These will, of course, vary depending on the console you're playing on, so here's a breakdown of the controls. 

PlayStation Build Controls

  • L1- Change between building materials 
  • Up - Toggle Map
  • Down - Emote
  • Right - Squad Comms
  • Left JoyStick - Movement
  • R2 - Confirm
  • R1 - Rotate building piece 
  • Triangle - Next building piece
  • Square - Trap (Tap/Hold) Interact (Tap / Hold)
  • Circle - Toggle building mode/Edit building piece (hold)
  • X - Jump 
  • Right JoyStick - Look
  • Right JoyStick (Up) - Repair or Reset building edit (edit mode)

Xbox Build Controls 

  • LT - Equip targeted building pieces 
  • LD - Change building material
  • Left Joystick - Move 
  • Left JoyStick (up) - Sprint
  • Up - Toggle Map
  • Down - Quick Chat
  • RT - Place building g or trap/confirm
  • RB - Rotate building piece
  • Y - Cycle building piece
  • X - Interact (tap/hold) Pick trap (tap) Jump to trap inventory (hold)
  • B - Switches to combat mode (tap) Edit building piece (hold) 
  • A - Jump 
  • Right JoyStick - Look
  • Right JoyStick (up) - Repair/Improve

PC Controls 

  • Left Shift - Crouch while building
  • Q - Wall
  • E - Stairs
  • Mouse button 5 - Roof
  • T - Trap
  • Left Mouse Button - Place structure 
  • H - Repair/Upgrade
  • R - Rotate building 
  • Right Mouse Button - Change materials 
  • F + Mouse Wheel Up - Building edit 
  • Left Mouse Button - Select building edit 
  • Mouse Wheel Up - Reset building edit 

There are ways to personalize your Fortnite building settings, changing which controls carry out which tasks, so if you're not feeling this setup, play around with this aspect to find which is the best Fortnite building keybind for you. Now that you're well-informed on the basics let's move on to the best strategies to use in-game to secure those wins! 

fortnite building techniques, key binds

Fortnite Building Techniques  

Using different techniques is essential for the structure you want to build and its purpose. In addition, you'll need to ensure your positioning is well thought out; failure to do so could make your designs misplaced, misshapen, and far less useful.  

You'll first want to establish where you want to position your structures; if you prefer to build your structures in a right-leaning structure, then ensure you stand slightly left of the grid tile you are replacing your structure. Similarly, when placing structures on walls/roofs, your line of sight on the object will determine the positioning of the structure. So make sure you're correctly positioned before you make your decision; this can be difficult mid-match, so consider practice runs. 

Ramp Cover 

This should be a breeze once you've got your technique under wraps. Creating simple ramps is an excellent way to survive while you find cover or can take a shot. Ramps will offer you cover from enemy fire, also allowing you to crouch and climb on some as a way of sneaking shots back. 

Make sure you don't climb every ramp and remain cautious and agile, as if your movements become too predictable, even the strongest structure won't save you from enemy fire.

Fortnite 90s

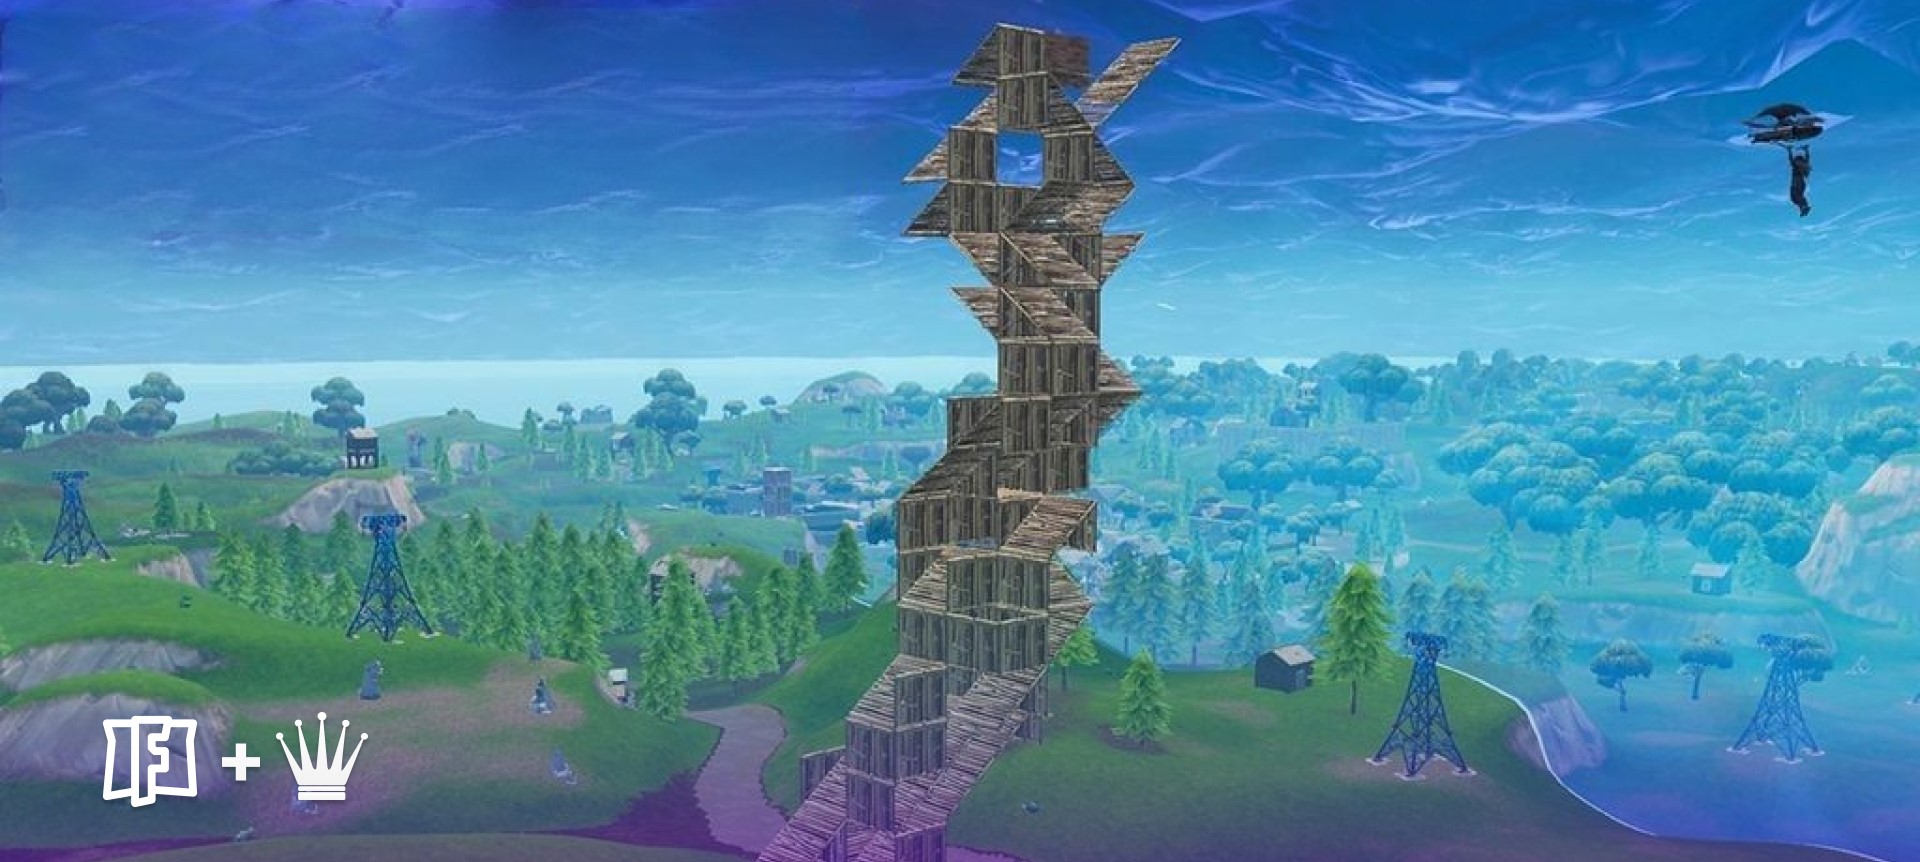
This method has quickly become a fan favorite due to its simplicity, speed, and effectiveness. Building 90s is simply building a high-standing structure in quick succession by turning 90 degrees with each level of your structure. Begin by creating a ramp, placing two/three walls, a floor, and another ramp, then repeat until you achieve the height you need. You'll quickly see how beneficial this method is as it provides excellent sights from above for you to seek out enemies and take them down, as well as providing you with additional cover.

Creating 90s will take some practice if you're looking to do it quickly, but if you're a fan of streaming, you'll most likely be aware of how fast the actions can be carried out with some dedication. So take a little time and consider Fortnite building practice runs in creative mode to get your technique down. 

Ramp Rush

This is an excellent technique for players who have to get somewhere fast. By building ramp after ramp, you can gain high ground and potentially escape danger quickly. You can up your chances of survival by placing walls along the structure and the occasional additional floor to avoid enemy fire and prevent others from chasing you up the ramp.

Coning Roofs 

Creating cone-shaped roofs can be used in a few different ways. For example, you can add them onto your 90s structures as additional cover from above when having Fortnite building battles with others. Doing so can prevent you from being taken out from above if your opponent takes higher ground before you. 

These structures fold forward or backward, meaning you can build away from their tilt and continue upward without issue. 

Side Jumping

This is one of the more difficult methods of Fortnite building, but if you can get the technique under wraps, you'll have an excellent new skill. 

This method is primarily used when you want to sneak up on an opponent in their own structure and take them down. To build the side jumps, you'll need to create a new floor/ramp beneath a roof, slightly to one side, then jump across and continue building the structure; this is one of the trickier methods because timing is critical. If you do not jump at the correct time, you will be unable to place the next segment of your structure, giving the opponent the upper hand again as they will no doubt continue upward and out of sight.
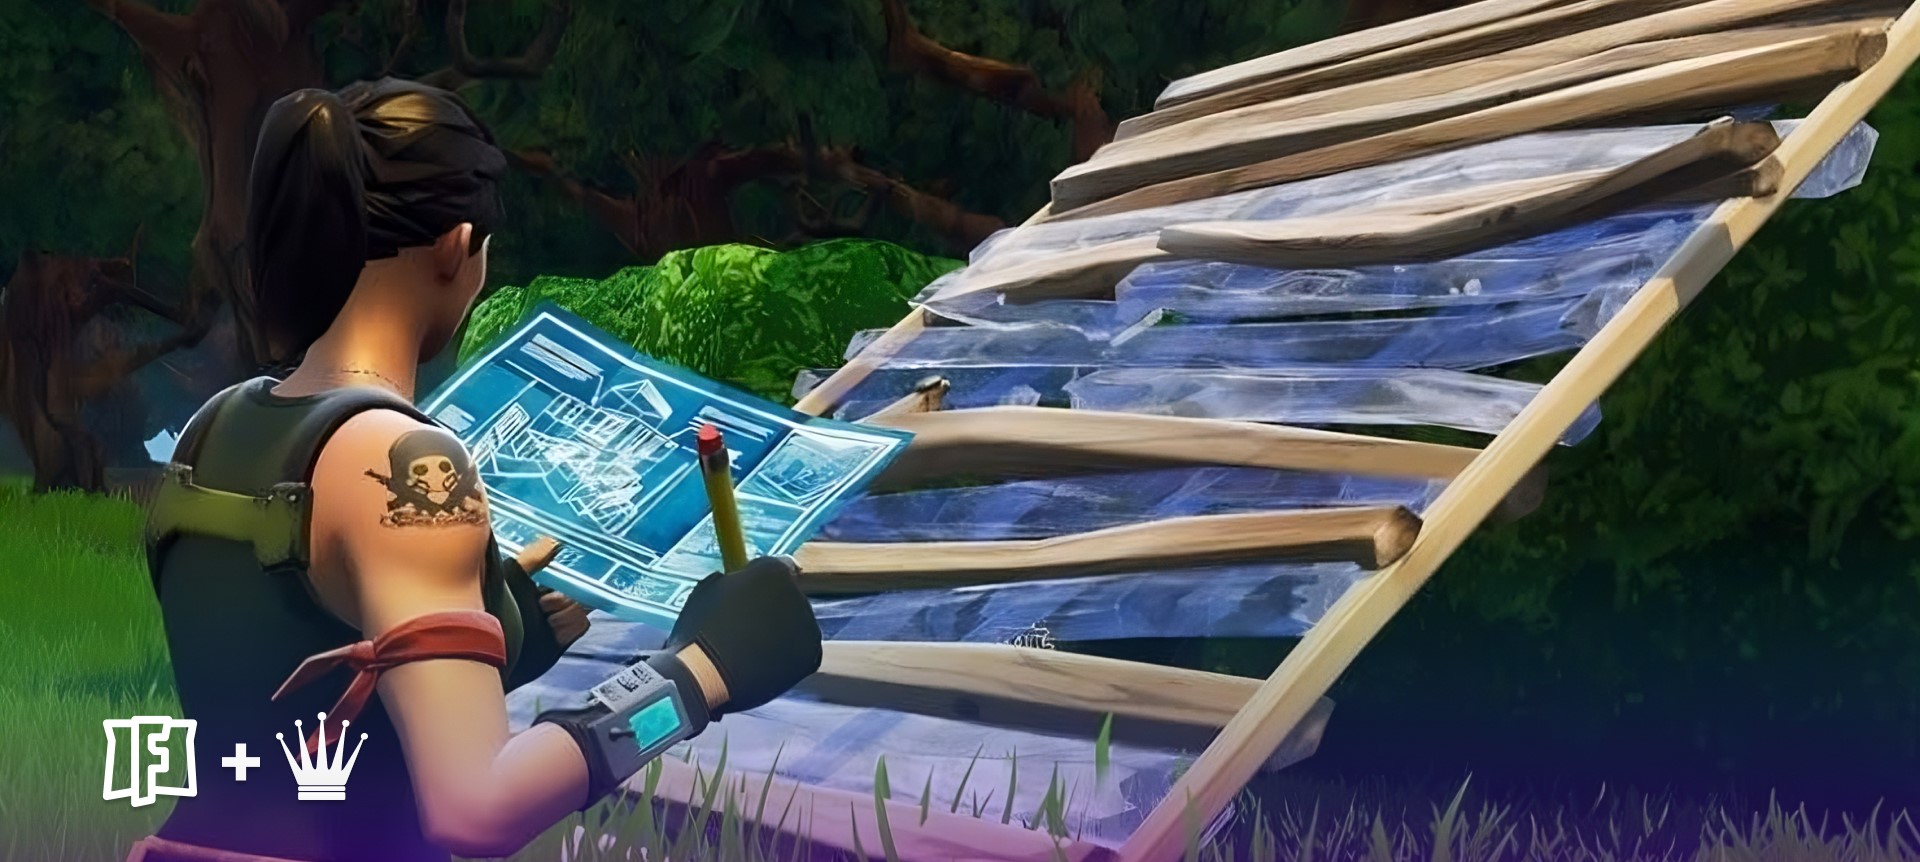
Editing

Editing is another tricky skill to master, but it can be extremely beneficial. Building new structural additions while editing existing sections isn't easy, but with enough practice, it can up your chances of a win significantly, allowing you to keep cover while incorporating windows or narrow passages to your build. All of this can be done with the simple press of a button, but as we mentioned, this technique can take a while to master, so it's certainly worth doing some practice runs to get your head around the steps.

Tunneling

Last on our Fortnite building technique list is tunneling, which includes creating tunnels while being in a high structure. You'll need to build a simple box at the top of your structure or wherever you want to place the tunnel, edit the front wall, and place another box behind that wall. Continue with these steps until you have created the structure you need. 

This technique will offer you an escape route while still providing cover from the already existing walls around you as you build forward.

Incorporating Fortnite Building in Battle

Now we've discussed controls, basics, and techniques, let's touch on how to seamlessly incorporate them into battle when a Victory Royale is up for grabs. So, what is the best way to apply your new skills once you've mastered them in creative mode practice runs? 

You'll first need to ensure you're confident with the strategies to achieve the best results. Building quickly and accurately is vital if you want to reach that #1 spot; without practice and finding your feet with these techniques, you'll be a walking beacon for opponents to shoot. 

Balance is key. Knowing when to build, when to shoot, and when to do both is half the battle. For instance, building alone can seldom get you the win unless, of course, you camp until the final two and get a lucky shot, which we wouldn't recommend. So, what do you do? Strategise. 

Building can be done in quick succession by seasoned players, so you'll, of course, need to be nimble and quick, but what then? This is when your aim and focus come into play, but this alone won't necessarily carry you to success. So let's look at a few strategies that combine both building and attack.

Peekers Advantage

'Peeking' is the term used when you've closed yourself into a structure for protection with a vantage point to take down opponents, and you 'peek' at them at different intervals to take them down. When two players are in this same situation and 'Peeking' to take the kill shot, your timing can be everything. So, how do you ensure you're the one still in the running after this intense standoff? It all comes down to timing, though this time, it's not just your own you'll need to be aware of. In situations such as this, jumping first can take you out of the competition quickly. Your best chance is to wait your opponent out, and when they jump, you jump afterward; but make sure you do so rather quickly. As when they're coming back down from the peek, you can catch them with a shot; if done successfully, you'll be on your way to Victory Royale!

Peek Window

Similarly to the peekers' advantage, you can create a peek window in one of your wall structures, using this as your literal window of opportunity. Of course, there's more to this strategy than the building aspect; now, depending on your preference, or even availability, you can structure your peek window differently. Choose whether you want the window to the left of your wall, central, or on the right. Once you have decided on the position of your window, you must then position yourself accordingly. For instance, if you choose a right-hand window, you will then stand slightly to the left and 'peek' at an angle, hopefully making a successful shot while your opponent passes by attempting their own shot.

A key aspect to remember with this technique is that your opponent, if familiar with peek windows, will have the same vantage point as you, so make sure you stay focused and keep a steady hand. 

Know Your Builds

As obvious as this suggestion may be, it is always good to keep it in mind. For instance, if you're boxed into your structure with an opponent outside one of the walls, and they build a ramp facing downward toward your structure and take out the wall facing you, your chances seem slim, don't they? Many players may think building an entire wall structure in front of the opponent is a surefire way to be safe once more, but this would be incorrect. When building certain structures, because they appear transparent or translucent until completion, your opponent may simply take the winning shot before you can build.

So, what should you do? Keep in mind which builds appear in which format. In this scenario, building a bottom right three-tile edit will provide cover so you can peek out, shooting the opponent in the feet or simply allowing you additional time to plan your next move. 

Pre-Firing

Pre-firing is a skill you'll need to master when an opponent has you locked down and is relentlessly breaking down your walls as you build them. So you'll need to keep your eyes open and ensure you time things perfectly. To use this method successfully, you'll first have to get yourself into a secure position, even if only momentarily; you'll just need enough time to aim whilst being protected. Once your opponent starts smashing down your walls, get them in your sights, and then here's where timing becomes genuinely crucial. The moment the wall comes down, fire your shot; not a moment sooner or later. If you miss your window of opportunity, you can kiss that win goodbye. 

Armored Walls

When looting, you may be fortunate enough to find some armored walls, and they can be literal lifesavers when it comes to an intense battle. The reason being that they are near impenetrable, though you'll have to keep in mind that where you place them matters, and once they are in place, that structure can no longer be edited. So although we are recommending you use them where needed and ensure you have thought the placement through.

There are, of course, many other techniques and strategies you can put into play, but practicing the above successfully is sure to help you grab those wins with relative ease. 

fortnite building, building in fortnite

Fortnite Building Tips for Success

Now that we've covered many of the do’s, let's take a look at a few of the don'ts, as they can be just as crucial to success.

Know When To Jump and Move

Many players get carried away and think Fortnite building offers them some sort of immunity, and that's simply not true. Even the best builders can still take a loss from time to time, and an excellent way to whittle down those losses is to know when to jump. Don't jump too often, especially in situations such as those with peekers' advantage. If your movements become too predictable, you make yourself far easier to kill. Try to be patient and ensure you keep your movements scarce and nonrepetitive. 

Don't Just Use Wood

Although wood is easier to acquire and quicker to build, choosing it all the time instead of some other in-game materials puts you at an immediate disadvantage. Wood walls, while being the quickest and easiest to build, are also the quickest and easiest to destroy, so when you have the materials at hand and the time to do so, don't neglect to use metal and stone; it could be a real game changer for you. 

Take the High Ground

Staying hidden and being stealthy can be great, but it won't always be enough when there are always excellent builders looking to take a downward shot. So, whenever possible, take the high ground, explore the map, find excellent loot, and take down some opponents in the process. 

Don't Overbuild

Given the nature of our blog, this may seem like bizarre advice, but it's important to remember that Fortnite building is meant to be strategic. Meaning if you just build structures haphazardly and there is little to no reason for them being where they are placed, or they don't provide cover, you can just make yourself a bigger target. Not only that, but you will just end up likely wasting precious materials you'll need later in the match. 

Fortnite Building FAQ

Now we’ve covered all the basics, check out some of the most frequently asked questions by players, so you don’t have to leave a thing to the imagination.

Where Can I Get Materials for Building?

There are an abundance of materials across the map for players to get what they need for their builds. But if you’re looking to stock up quickly and get straight to it then the following sections of the map are excellent choices:

  • Junk Junction (Metal)
  • Wailing Woods (Wood)
  • Snobby Shores (Stone)

Which Tools Are the Best for Harvesting Materials?

Any old pickaxe will get the job done, but if you’re meticulous with measuring damage, effectiveness and more, then we recommend the Minty Mountaineer pickaxe. This is the game's first one handed pickaxe and it has a faster swing and less delays.

How Many Materials Can I Carry at Any Given Time?

Previously, players could hold up to 999 materials, however, as of a v24.40 update, this has been lowered to only 500. Which, while still being a decent number, has quite literally cut your inventory in half. So ensure you keep an eye on your stock and replenish when needed.

fortnite building map, building in fortnite

Fortnite Building Guide Conclusion

This concludes our guide for this week! If you came here wondering how to get good at building in Fortnite, we certainly hope we've provided you with the answers needed to do so. Don't forget to keep practicing your skills and put your knowledge to the test. Even in creative mode, you'll gradually improve your technique and become more capable with each attempt; soon, you'll secure those Victory Royales effortlessly! If you're facing any other issues in Fortnite, why not look at our Fortnite range? You can find exceptional accounts, as well as some of the best in-game items available, all for the most competitive rates on the market. For further Fortnite walkthroughs, check out our extensive library here, where you can locate articles such as 'How To Level Up Fast In Fortnite' as well as other excellent reads. 

logo
Best Lost Ark Gunslinger builds Best Lost Ark Gunslinger builds Tips & Tricks

The Gunslinger build in Lost Ark focuses on its unique dynamic of owning three separate weapons: a shotgun, pistols, and a rifle. In terms of difficulty, it is one of the most challenging classes with the potential to be the most rewarding if played right.This Gunslinger build in Lost Ark overview covers a wide range of mechanics and playstyles and we will focus on two or three major PvE and PvP builds. The Gunslinger has a lot of mobility and AoE damage but is typically very squishy, so let's go through some of the major build options of the class to better understand it. Eager to try a Lost Ark Gunslinger build but not sure where to begin? Let Chicks Gold do the work for you; buy Lost Ark accounts already leveled and equipped with the best items. Rush to the fields of Arkesia and decimate any foe that stands in your way!

How strong is the Gunslinger build in Lost Ark?

The benefits of the Gunslinger include swiftness, agility, and tremendous damage. In contrast, low hitpoints and defense are a drawback of picking this class. While her playstyle is not the most complicated among the Lost Ark classes, it may take some time to learn her controls and keep track of cooldowns and weapon rotations.

The core of any Lost Ark Gunslinger build are three weapons on her Identity Gauge, which may be rotated at any time to maximize their potential. In the hands of a Gunslinger, the twin pistols serve as a utility weapon. With them, players can apply buffs on themselves and

have tremendous mobility.

When it comes to short-range damage, the shotgun is the Gunslinger's weapon of choice. However, bear in mind not to choose the Time to Hunt engraving as your endgame specialization as it will restrict the use of the shotgun. When talking about long-range, Gunslingers are equipped with a rifle. Equipped with the Peacemaker engraving, this weapon can be twice as deadly.

Is the Gunslinger a good class in Lost Ark?

Many of Gunslinger's abilities revolve around her arsenal that can be utilized in a number of ways to enhance her accuracy. Besides her top-tier mobility, players can boost Gunslinger’s excellent arsenal with skill-based grenades.

There are three distinct colors for pistol, shotgun, and rifle skills the Gunslinger build in Lost Ark owns; orange for pistols, blue for shotgun, and purple for rifle skills. A standard skill build will carry your character to the endgame by the time you reach Level 50, assuming you have gathered at least 250 skill points.

Lost Ark Gunslinger build PvE skills

Pistol

Bullet Rain – Fire for 2 seconds

  • T1 Vital Point Shot boosts the Critical chance by 20%
  • T2 Rapid Fire increases Bullet Rain’s duration up to 5 seconds and provides a 60% damage boost  
  • T3 Quick Prep grants a 30% chance to remove the skill’s cooldown upon each hit

Equilibrium – Inflict AoE damage with dual pistols  

  • T1 Weakness Exposure debuffs enemies with a -10% Crit resistance for 12 seconds
  • T2 Enemy Raid makes Equilibrium a 360-degree skill (enemies at Challenge difficulty or below take 100% more damage)
  • T3 Vital Point Shot increases the Critical chance by 60%

AT02 Grenade – Throw a grenade up to 10 meters

  • T1 Wide Explosion makes the grenade radius 20% larger
  • T2 Freeze Grenade freezes enemies in place but reduces the skill’s damage by 75%


Dextrous Shot – Dash 6 meters while firing 4 times, can be used twice

  • T1 Agile Movement buffs attack speed by 10%

Spiral Tracker – Throw a pistol up to 10 meters while firing 15 times

  • T1 Weakness Exposure debuffs enemies with a -10% Crit resistance for 12 seconds

Rifle

Focused Shot - Shoot twice to reduce the enemy’s movement speed by 80% for 2 seconds. The third shot deals double damage and knocks enemies down

  • T1 Quick Aim reduces the time required to aim  
  • T2 Flash buffs every third shot with a 3-second stun
  • T3 Quick Finish applies Kill Confirmation and increases damage by 150%

Spiral Flame – Fire a bullet that knocks enemies up and deals fire damage. The ground around the enemy is set on fire and deals damage for 2.5 seconds

  • T1 Quick Aim reduces the time required to aim by 50%
  • T2 Kill Confirmation boosts Critical chance by 60% against enemies with less than 50% HP

Lost Ark Gunslinger build PvP skills

Pistol

Death Fire – Shoot for 3 seconds and up to 9 hits, when hitting the Perfect Zone, the character throws a grenade and dashes backward. Enemies hit are knocked up into the air

  • T1 Keen Strike increases Critical chance of Death Fire by 80%
  • T2 Chain Throw enables the character to throw a second grenade during the Perfect Zone
  • T3 Infiltrate Decimation teleports the character forward 6 meters and then instantly back 8 meters

Somersault Shot – Move 10 meters while firing

  • T1 Agile Movement increases Attack speed by 18%
  • T2 Master of Evasion increases dodge chance by 20%
  • T3 Double Jump allows for another Somersault shot and adds 2 more meters and 2 more shots

Dexterous Shot – Dash 6 meters while firing 4 times, can be used twice

  •  T1 Agile Movement buffs Attack speed by 18%
  • T2 Excellent Mobility increases move distance by 3 meters

Quick Step – Dash 6 meters while firing

  • T1 Excellent Mobility increases move distance by 2 meters

Focused Shot – Shoot twice to reduce the enemy’s movement speed by 80% for 2 seconds. The third shot deals double damage and knocks enemies down

  • T1 Quick Aim reduces the time required to aim  
  • T2 Enhanced Bullet deals 95% damage to enemies with less than 50% HP
  • T3 Quick Finish applies Kill Confirmation and increases damage by 200%

Perfect Shot – Fire a high-damaging bullet and once in the Perfect Zone, deal increased damage while knocking enemies back

  • T1 Stable Stance makes the character immune to paralysis
  • T2 Precision Shot boosts Critical chance on Perfect Zone by 80% and shortens its period
  • T3 Enhanced Shot increases Perfect Zone increases by 80%

Shotgun

Last Request – shoot an explosive shell that damages and knocks enemies up

  • T1 Ice Shot turns element into the water and reduces enemy movement speed by 70% for 5 seconds

Lost Ark Gunslinger build engravings

Engravings may be applied to the Gunslinger build in Lost Ark after reaching Level 50. To enhance your character's abilities, you may apply a wide range of engravings. Every class gets two ’class bonus’ engravings in addition to the basic ones given to all characters.

By utilizing these, you may designate a subclass for them. Class-specific engravings include Peacemaker and Hunting Time. Both are excellent options for PvE or PvP Gunslinger builds, so it is up to you to decide which one you prefer.

In Handgun Stance, the Peacemaker boosts Attack speed by 16%, Critical chance in Shotgun Stance by 25%, and damage in Rifle Stance by 10%. Additionally, in Rifle Stance, a boost of up to 30% is added on top of the damage dealt to enemies with less than 50% HP.

The shotgun cannot be used with Time to Hunt, however, the engraving offers benefits for the other two weapons; it increases the Critical chance for pistol and rifle abilities by 30%. Due to the shotgun's low utility, this engraving fits the pistol and rifle more. Gunslinger's class bonuses are excellent for both PvE and PvP combat, so there is not much need to modify them.

Depending on the number of engraving spaces you have available, the number of engravings you may install might vary so pay attention to that. Learned Engraving slots, required for class-specific engravings, may be obtained by reading books acquired during your Arkesia travels.

The two ‘generic’ engravings (damage boosts and utility buffs) that may be carried by all classes are equipped based on the number of engraving points you have. All of your character's equipment (necklaces, earrings, rings, etc.) and Ability stones (which may be obtained as loot or purchased from merchants) determine how many engraving points you get. You should be able to fit three generic engravings in addition to your class bonus if you max out your engraving points to 35.

When battling Bosses or higher-level monsters, Grudge is the best PvE option regardless of class bonus. The Grudge enhances damage by up to 20% while lowering damage taken by the same percentage. On the other hand, Cursed Doll engraving increases damage by 16% but debuffs the incoming healing by 25%. Moreover, Keep Weapon Blunt improves the Critical chance by 50%, but it reduces the damage dealt by 20%.

Lost Ark Gunslinger build stats and items

The Gunslinger in Lost Ark can get Combat Stats from accessory items such as necklaces, earrings, and rings. If you want to maximize your character's potential, it is crucial to target gear with the correct substats. Prioritizing Crit and Specialization will be paramount for Gunslingers throughout the main plot. While Specialization grants damage enhancements to weapon categories, Crit enhances your critical strike rate and damage.

You have the option of keeping Specialization as your secondary stat or switching to Swiftness to shorten your cooldowns. Specialization builds have stronger burst damage, while Swiftness builds offer a more constant DPS output for your Gunslinger build in Lost Ark.

Lost Ark Gunslinger build Awakening skills

Level 50 is the threshold at which Awakening skills become available to the Gunslinger. Players can choose to unlock both skills, however, they can equip one of the two Awakening skills at the time.

Eye of Twilight reduces movement and attack speed while dealing damage and inflicting Stagger and Weak effects on enemies. The second Awakening skill High-Calibre HE Bullet allows the player to jump backward and deal AoE damage with the Stagger effect. The High-Calibre HE Bullet is a better choice for Gunslingers due to its high utility that complements the class.

Lost Ark Gunslinger build leveling

Within the first 20 levels, players can deck out their characters fairly well thanks to good starting abilities and skills that progressively get unlocked. A player's ability to upgrade skills and unlock new ‘tripods’ increases as he or she gains experience and progresses through the game. Tripods are skill improvements that become available at levels 4, 7, and 10, and adding them to skills gives them another function. It is important to pick your normal skills and their improvements in the early stages of the game in order to create a Lost Ark Gunslinger build that suits your preferences. Equilibrium, Sharpshooter, Bullet Rain, Focused Shot, and Quick Step are the best skills to spend all of your points on during leveling. When you reach Level 50, you will be able to use Engravings and Awakening skills to further customize your build.

Hopefully, you enjoyed our Best Lost Ark Gunslinger builds guide and learned something useful for your playthroughs. Should you require any Lost Ark services, make sure to visit our buy Lost Ark gold and accounts pages to get the most affordable rates on the market.